Step 1. Customize your brand styles first
Before touching any content, update the global styles. This instantly applies your fonts, colors, and link styles across the entire site — you won't have to update every element manually.
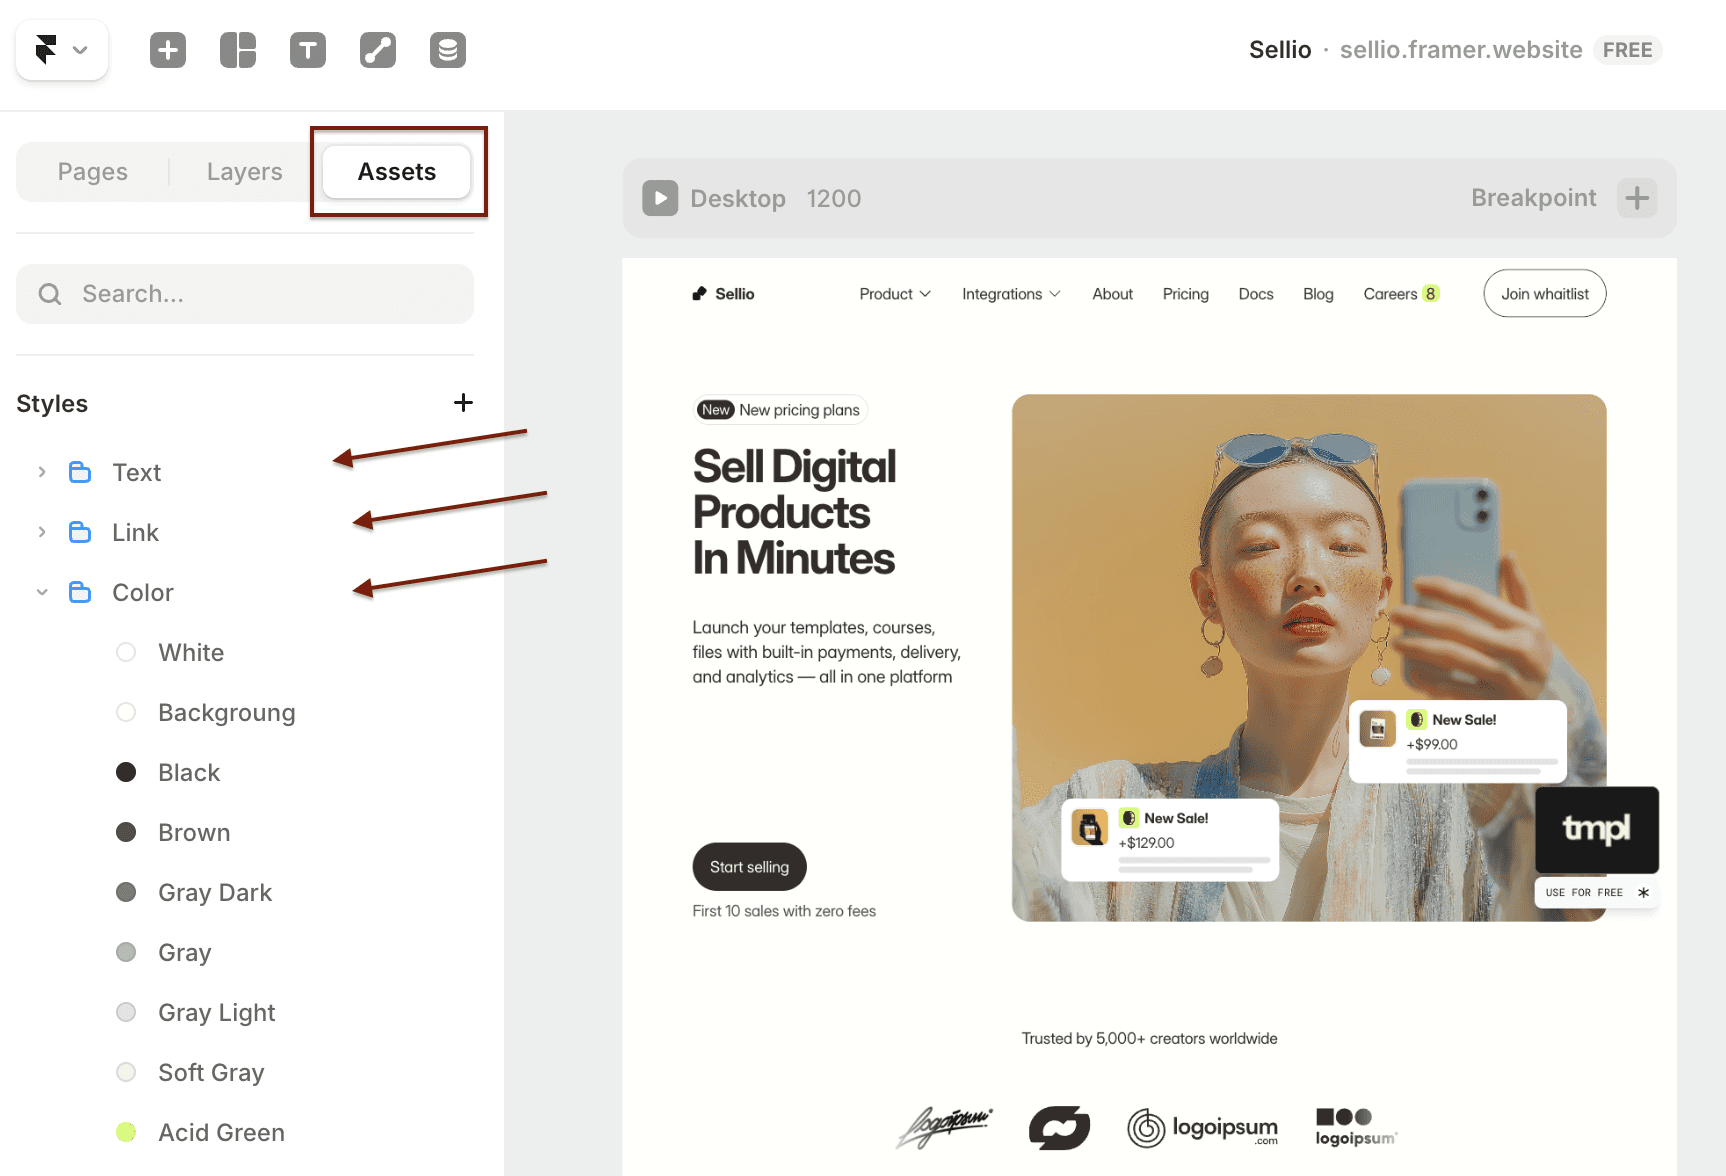
Open the Assets panel in the top left corner of the Framer editor
Scroll down to Styles → Text, Link, Color
Update:
Text — choose your font family and sizes
Link — set link color and hover style
Color — adjust brand colors (swap the accent color to yours)
Tip: always update the existing styles, don't create new ones. New styles won't be applied to existing elements automatically.
Step 2. Update the header
The header is a global component — changes apply across all pages automatically.
To edit it: click directly on the header on the canvas, or go to Assets → Templates → Template and double-click it.
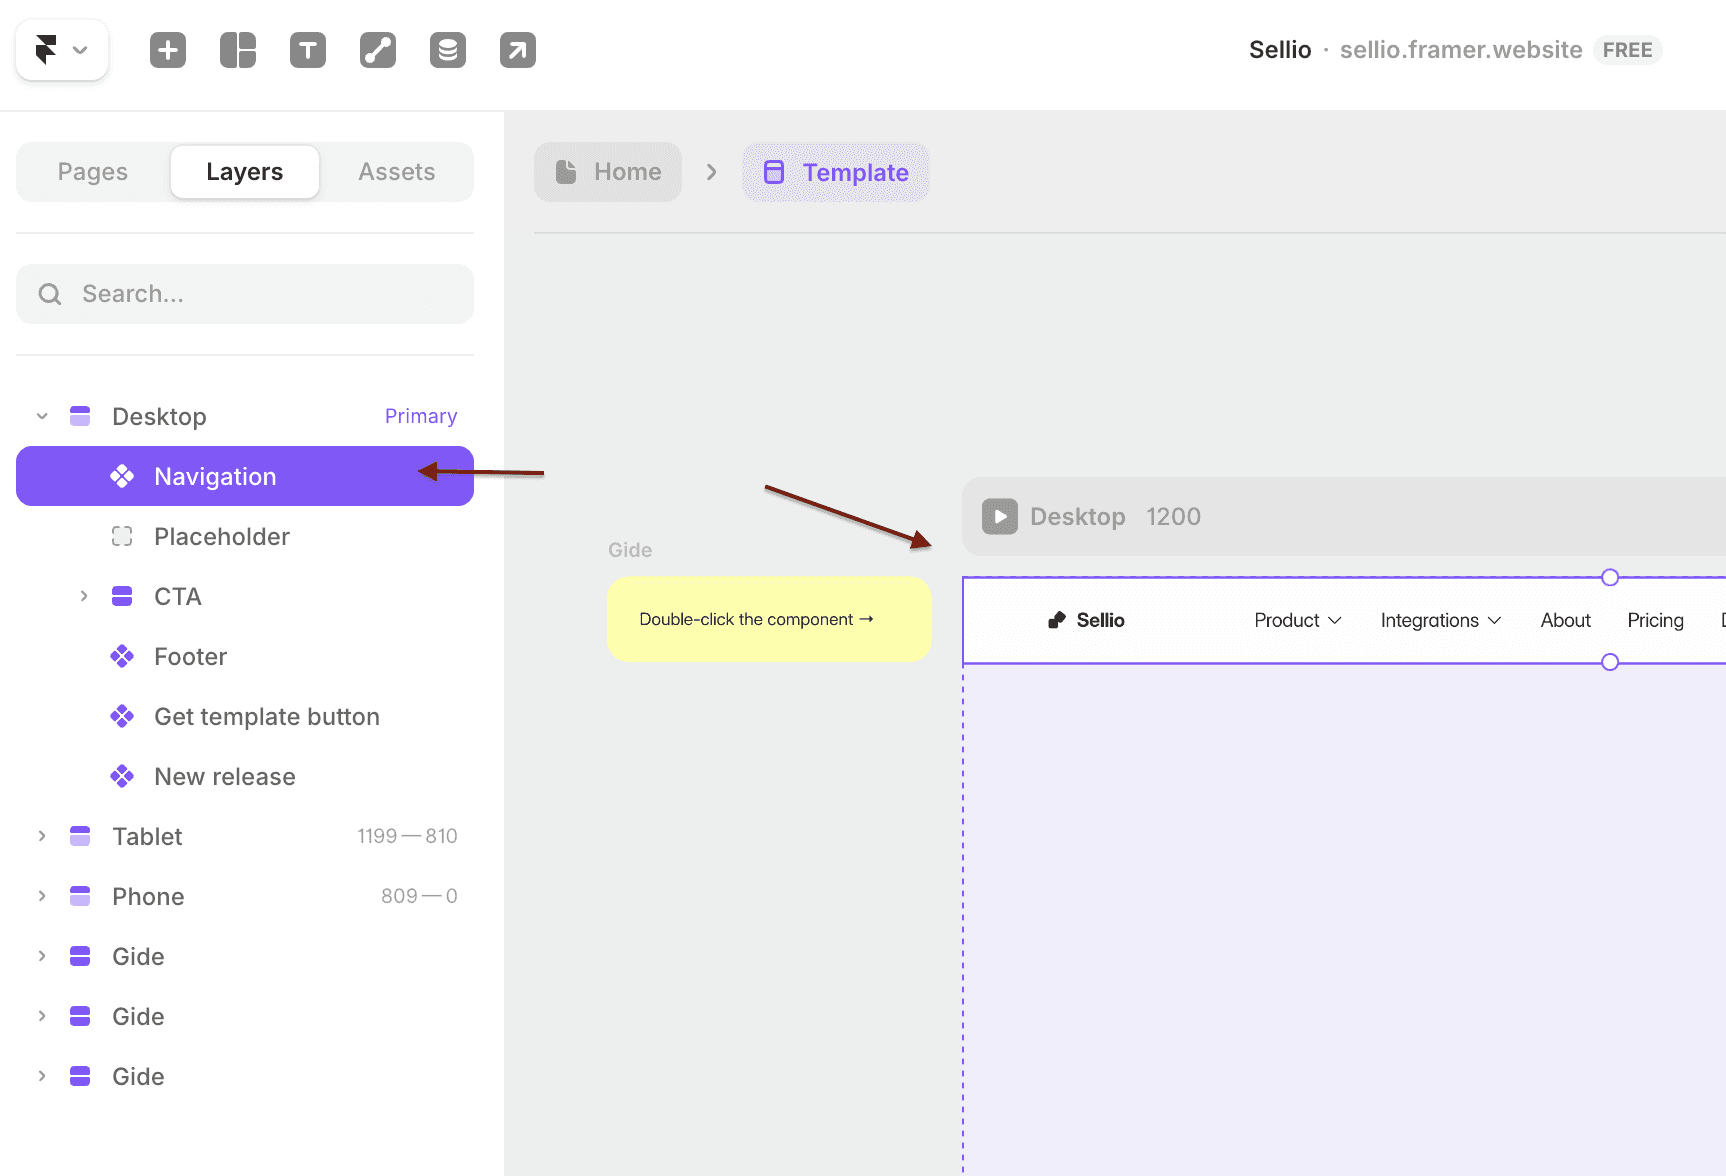
Inside the header you can update:
Logo — select the Logo block in the Layers panel, then replace the image or update the brand name text.
Menu links — select any Nav Item and set the Label, Link, and Variant (No Overlay for simple links, Overlay for dropdowns).
CTA button — update the Button Text, set the Link, and enable New Tab if needed.
Step 3. Update the footer
The footer is also a global component. Double-click it on the page, or go to Assets → Templates → Template.
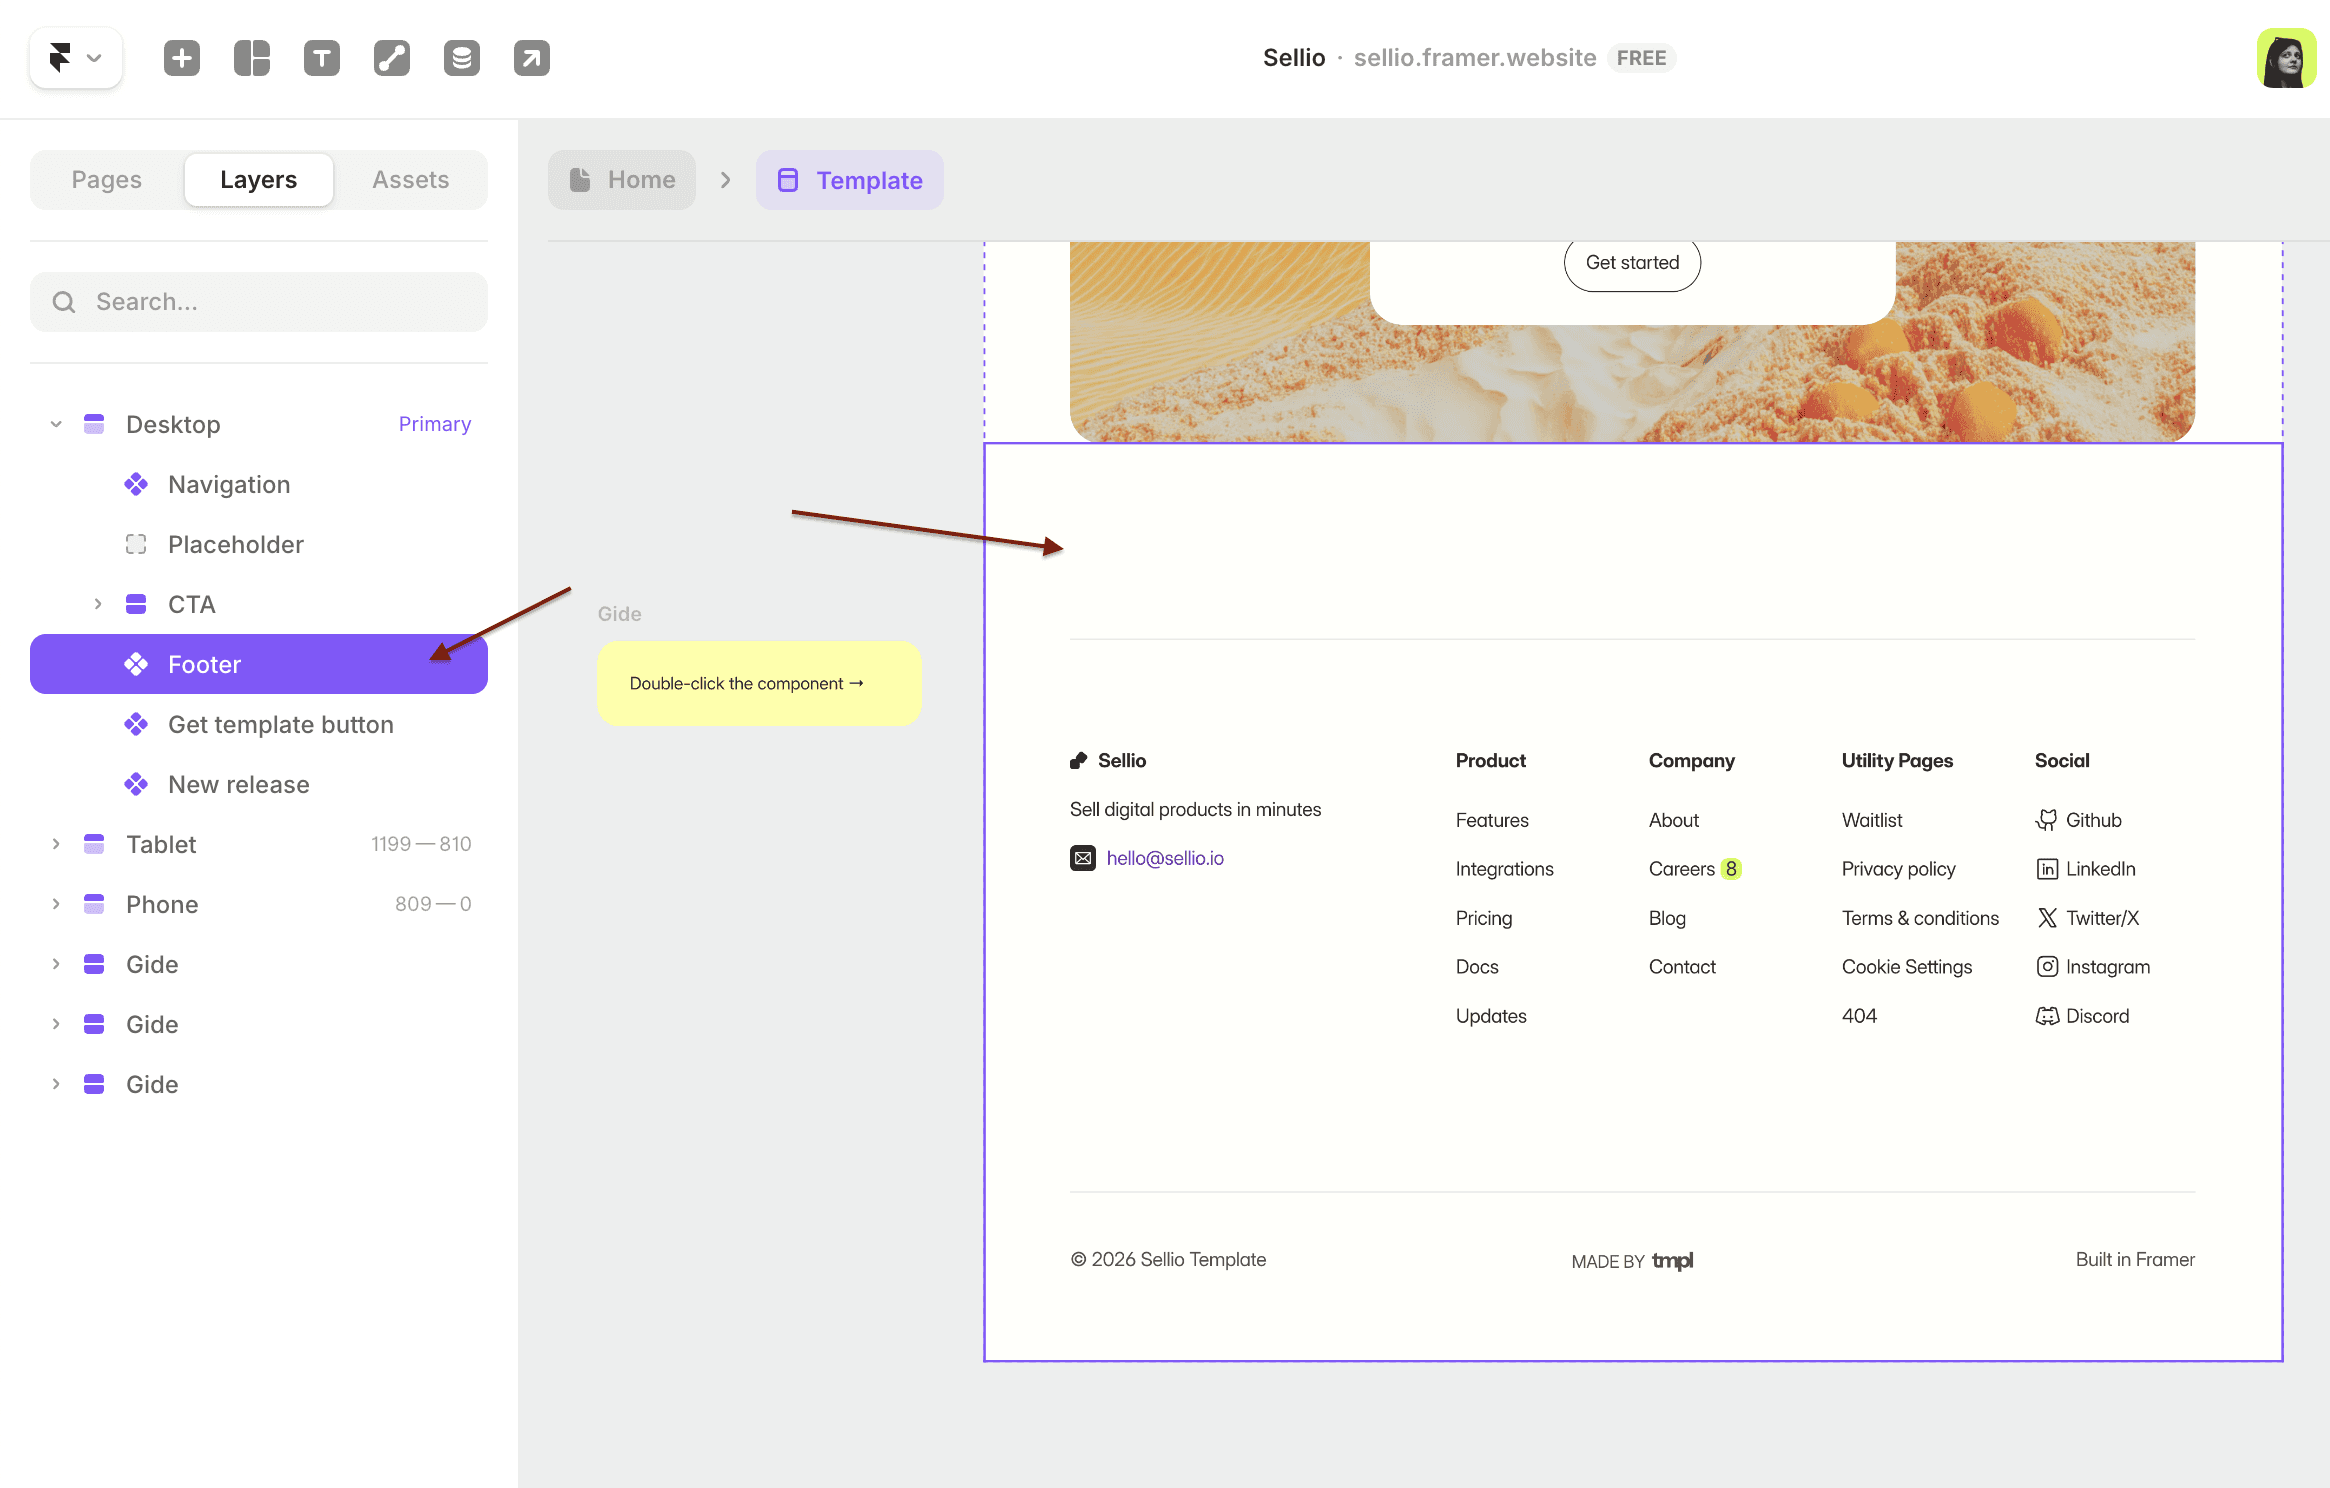
Inside you can update: logo and description, navigation links, social links, legal page links. All changes apply across the entire site.
Step 4. Update your page content
There are two types of content blocks in a Framer template:
Regular blocks — text, headings, paragraphs. Double-click directly on the text to edit, or use the right-hand panel.
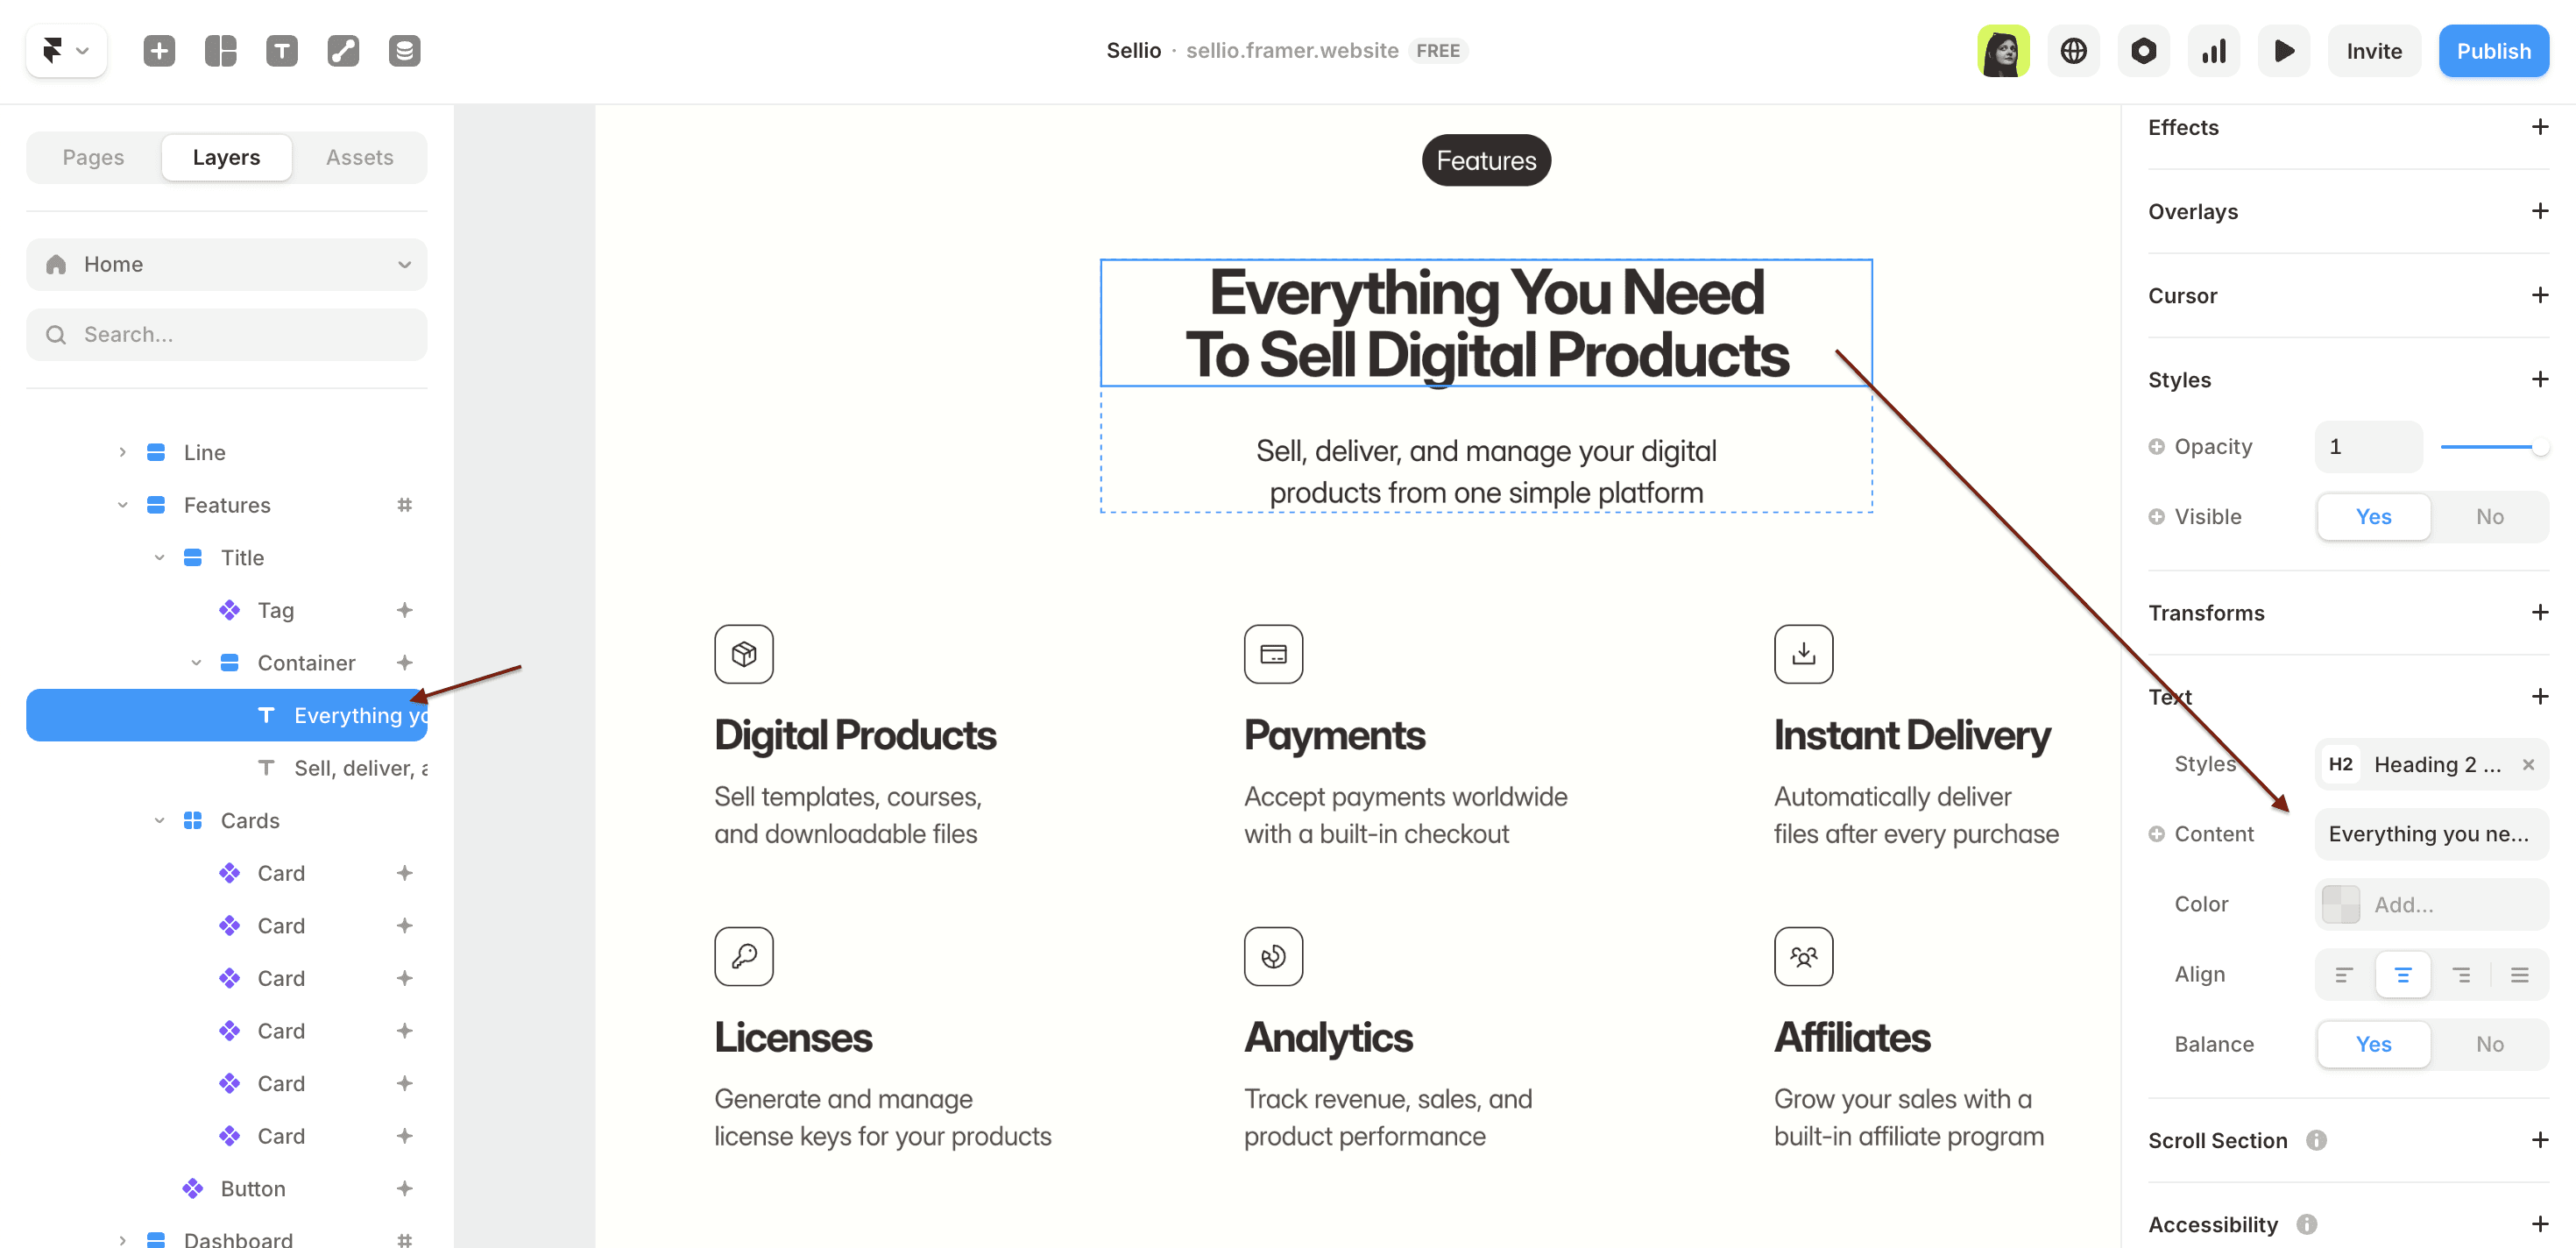
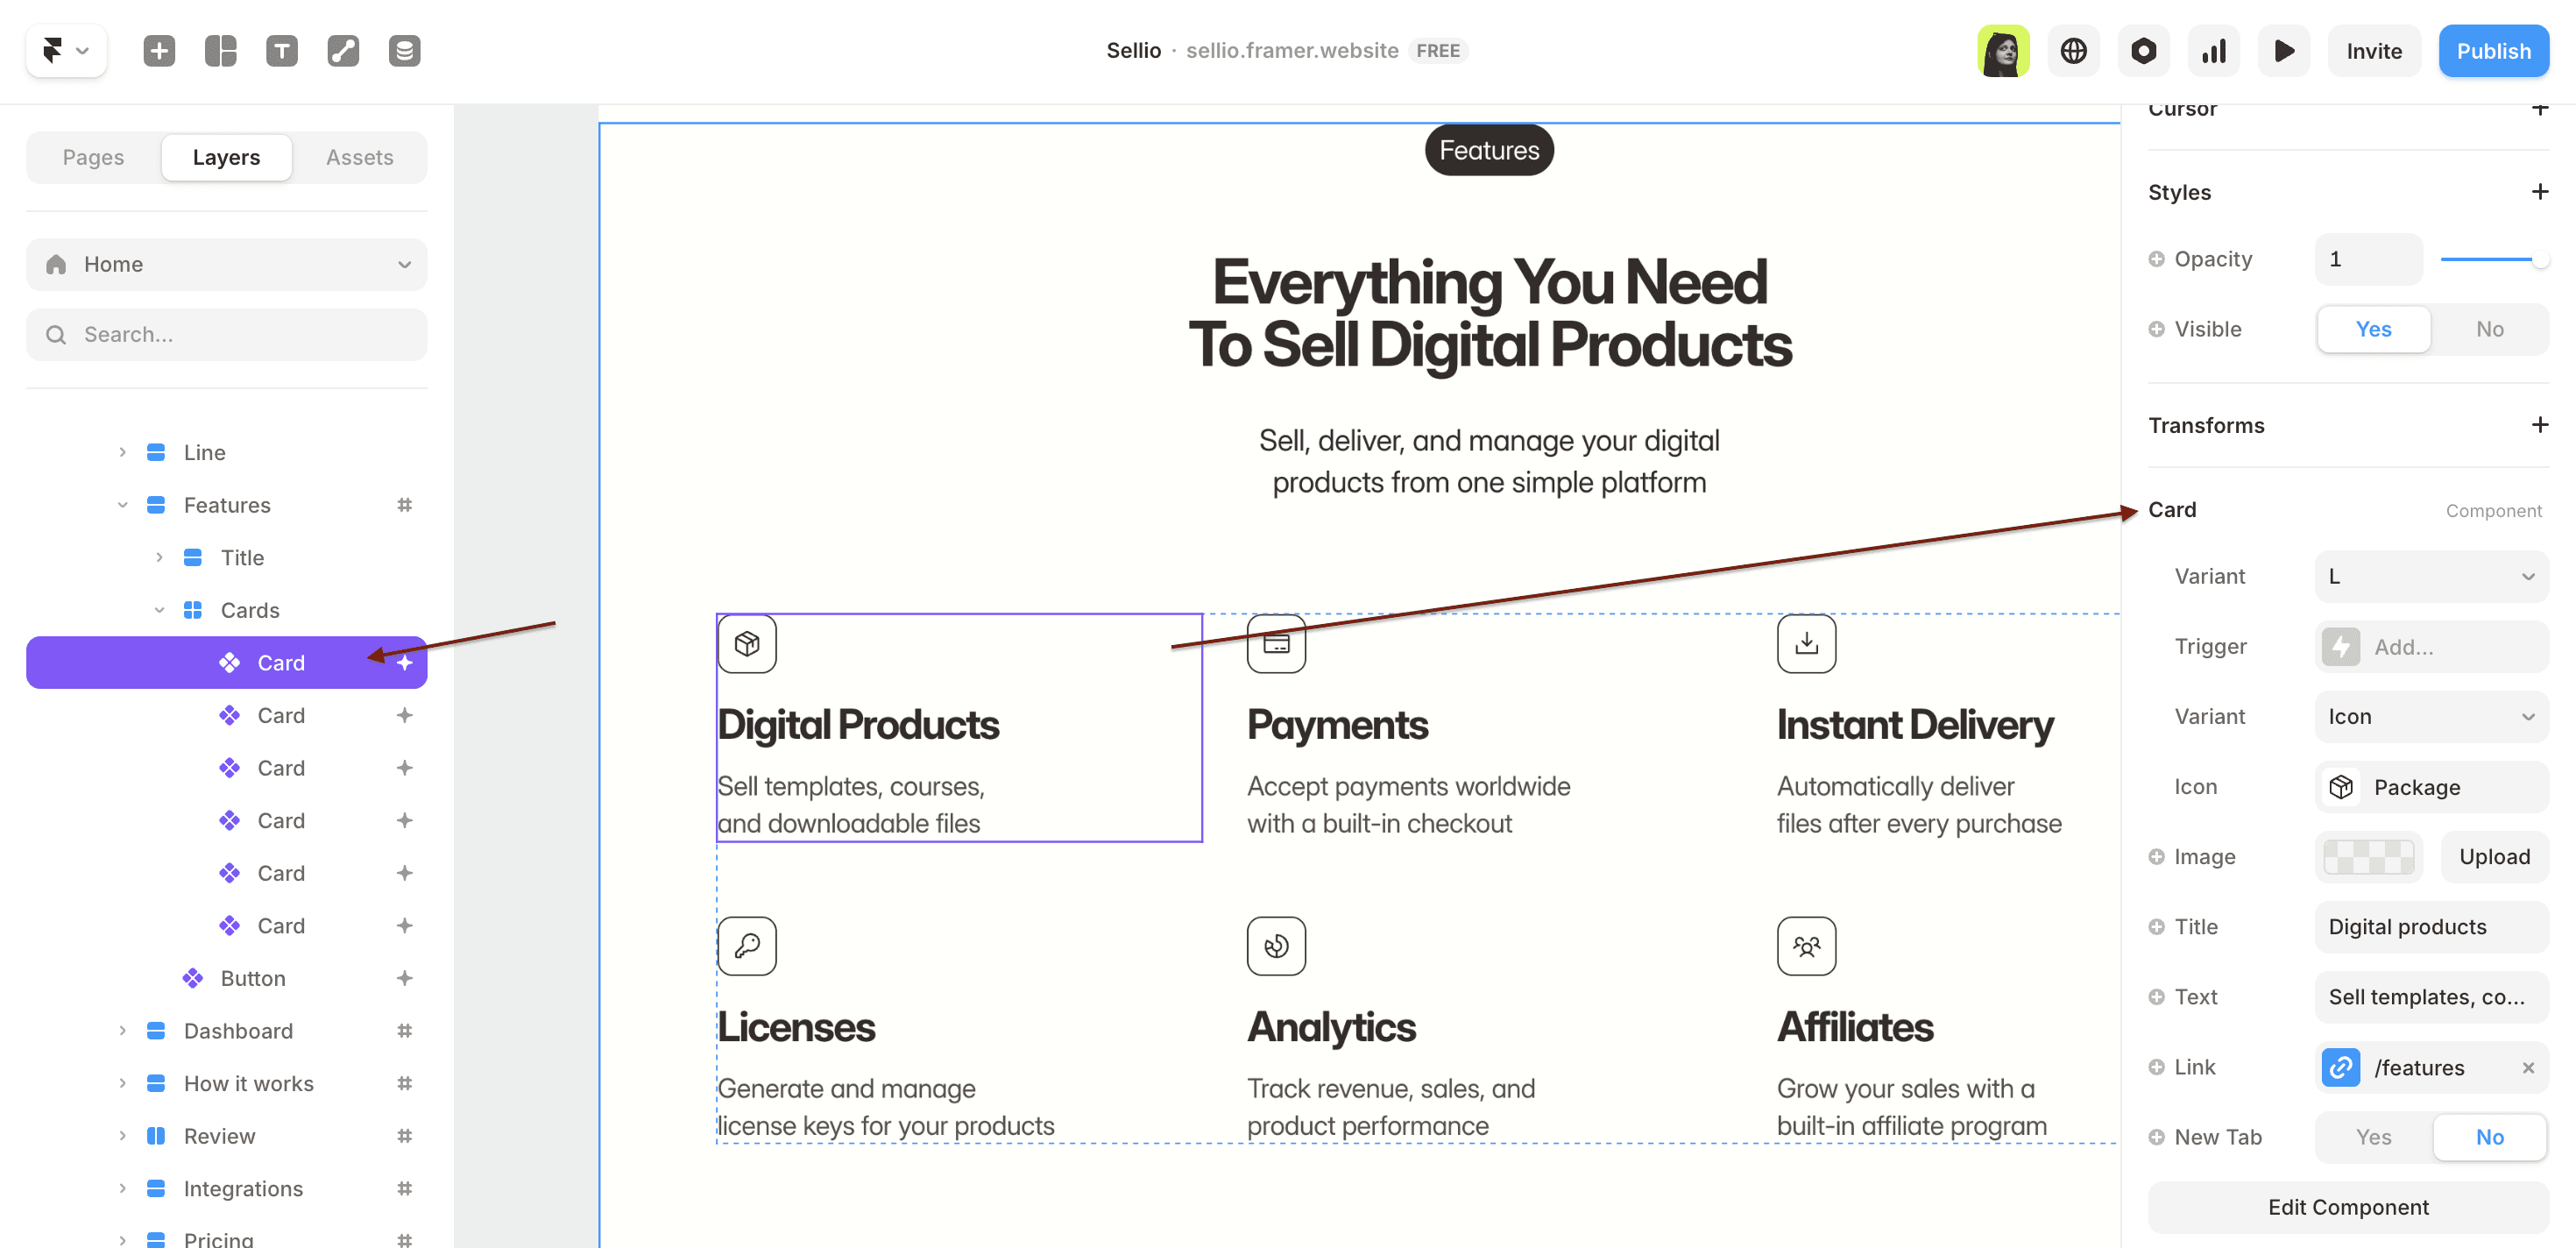
Components — reusable elements like buttons, cards, FAQ items. Edit them through the right panel — each field is listed there (title, text, icon, link, visibility).
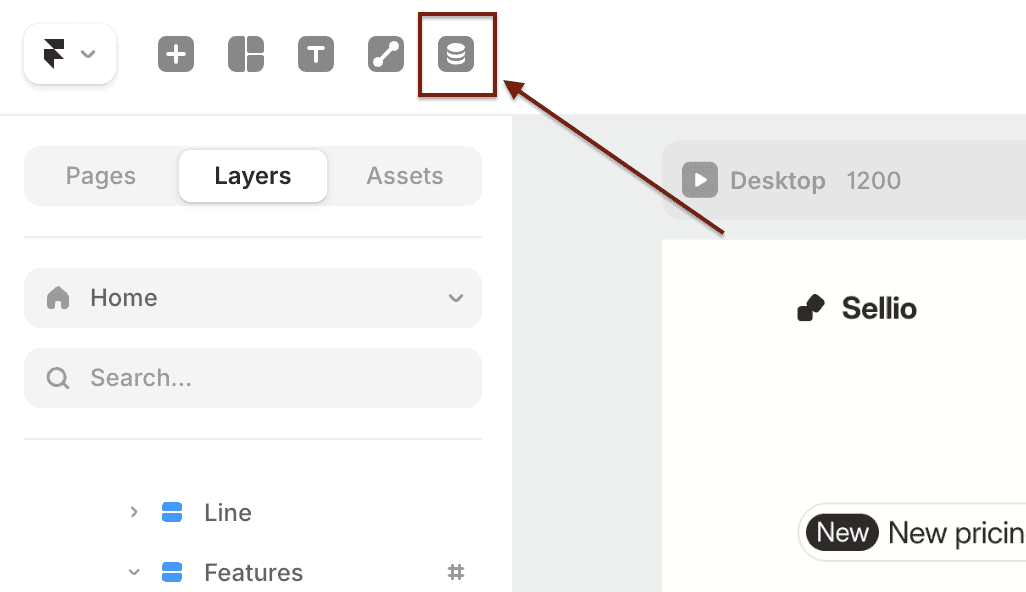
Step 5. Update CMS content
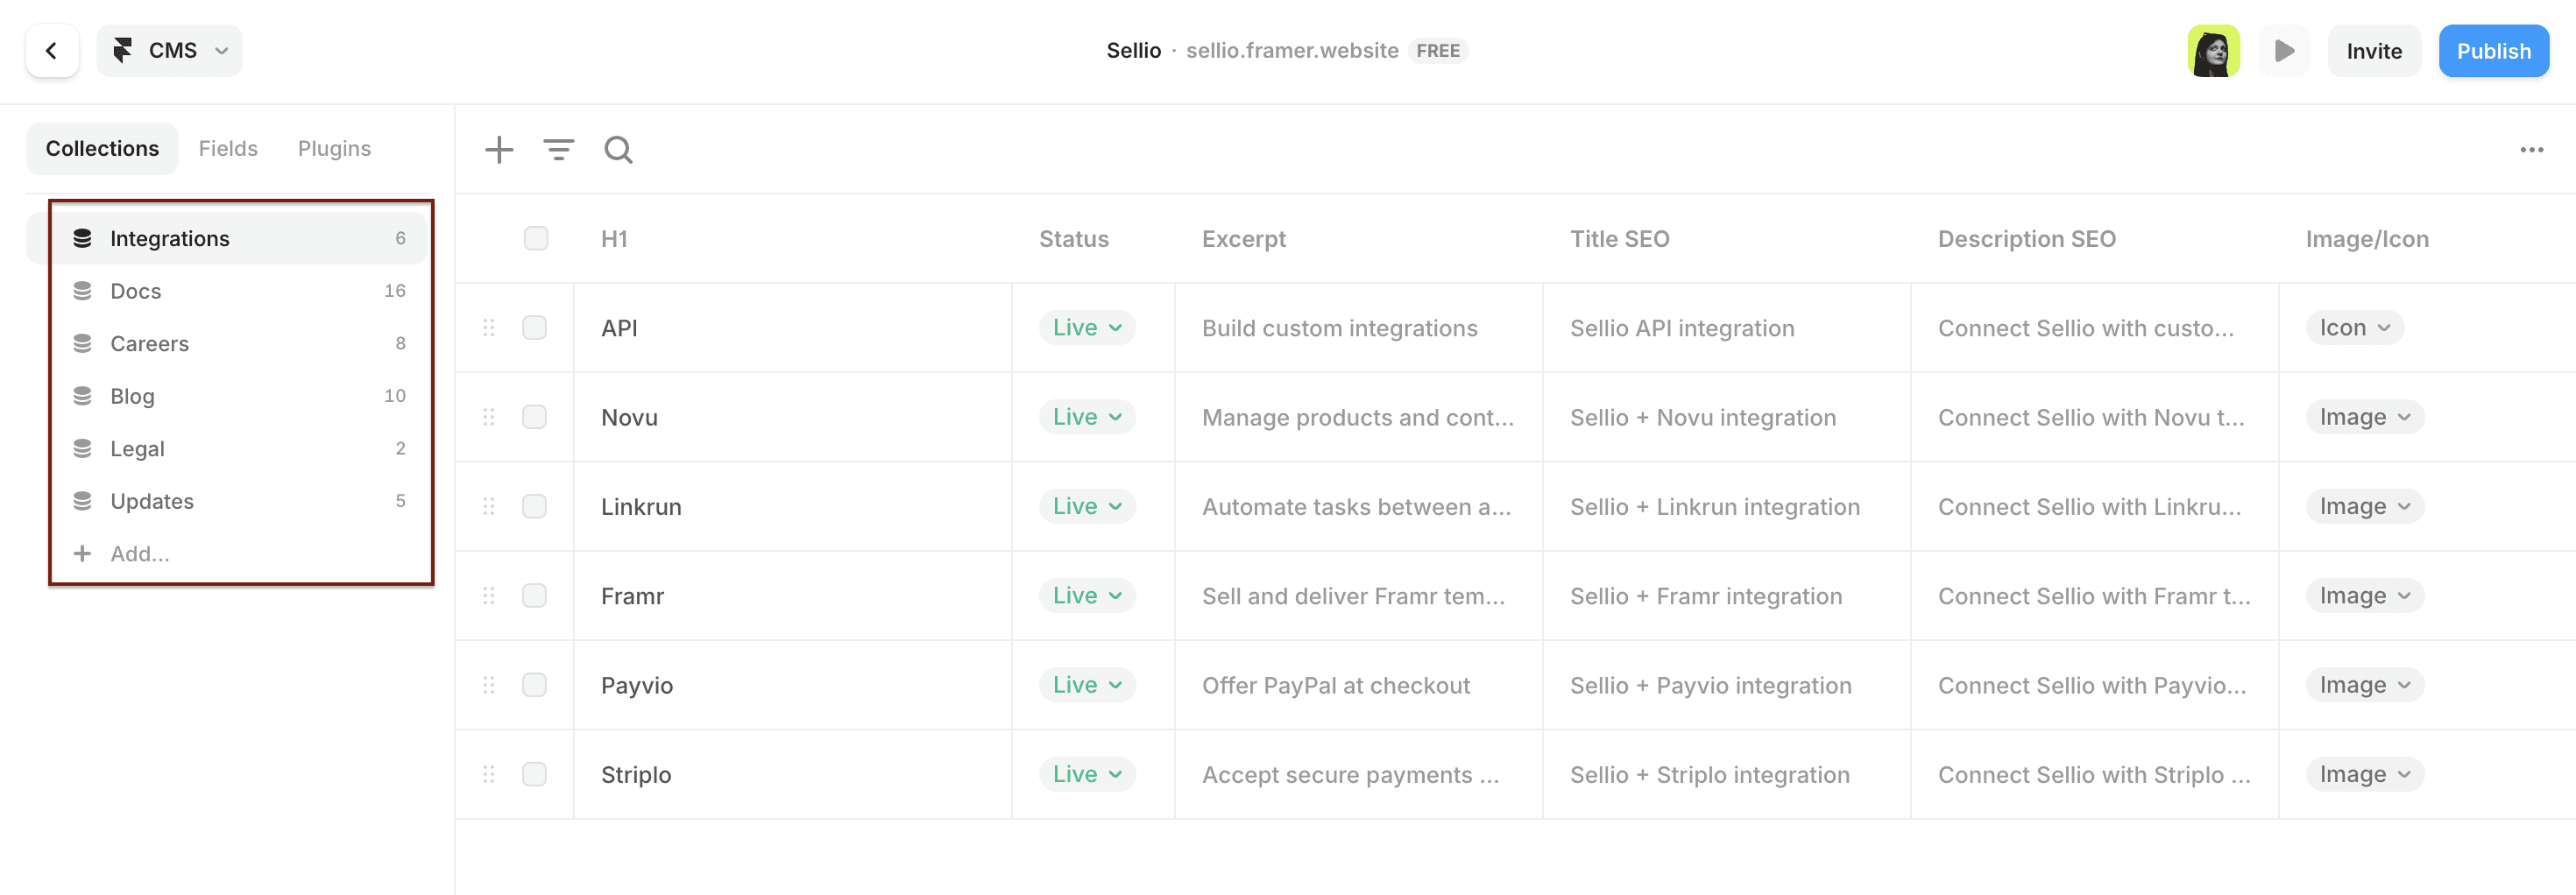
If your template uses CMS (blog posts, project pages, team members, integrations) — click the database icon in the top panel to open CMS collections.
Inside you can: add, edit, or delete items, change titles, descriptions, icons, and SEO fields. All connected sections on the site update automatically when CMS content changes.
Step 6. Set up before publishing

Before going live, fill in the key settings:
Click the settings icon (gear) in the top bar
Go to Site Settings and fill in:
Site title — shown in browser tabs and search results
Site description — a short summary for SEO
Language — make sure it matches your content
Connect your custom domain in the Domains tab (requires a paid plan)
Click Publish in the top right corner
Your site goes live instantly. To update after edits — click Publish again.
Looking for a Framer template to edit? TMPL templates come with a detailed setup guide included. Browse the collection.

