What you'll need
A Google Analytics account with a GA4 property set up
Your Measurement ID (starts with G-)
A published Framer site
Step 1. Get your Google Analytics Measurement ID
If you don't have a Google Analytics account yet, create one at analytics.google.com — it's free.
Once you have an account:
Go to your Google Analytics dashboard
Click the search bar and search for "Measurement ID"
Copy the ID — it looks like G-XXXXXXXXXX
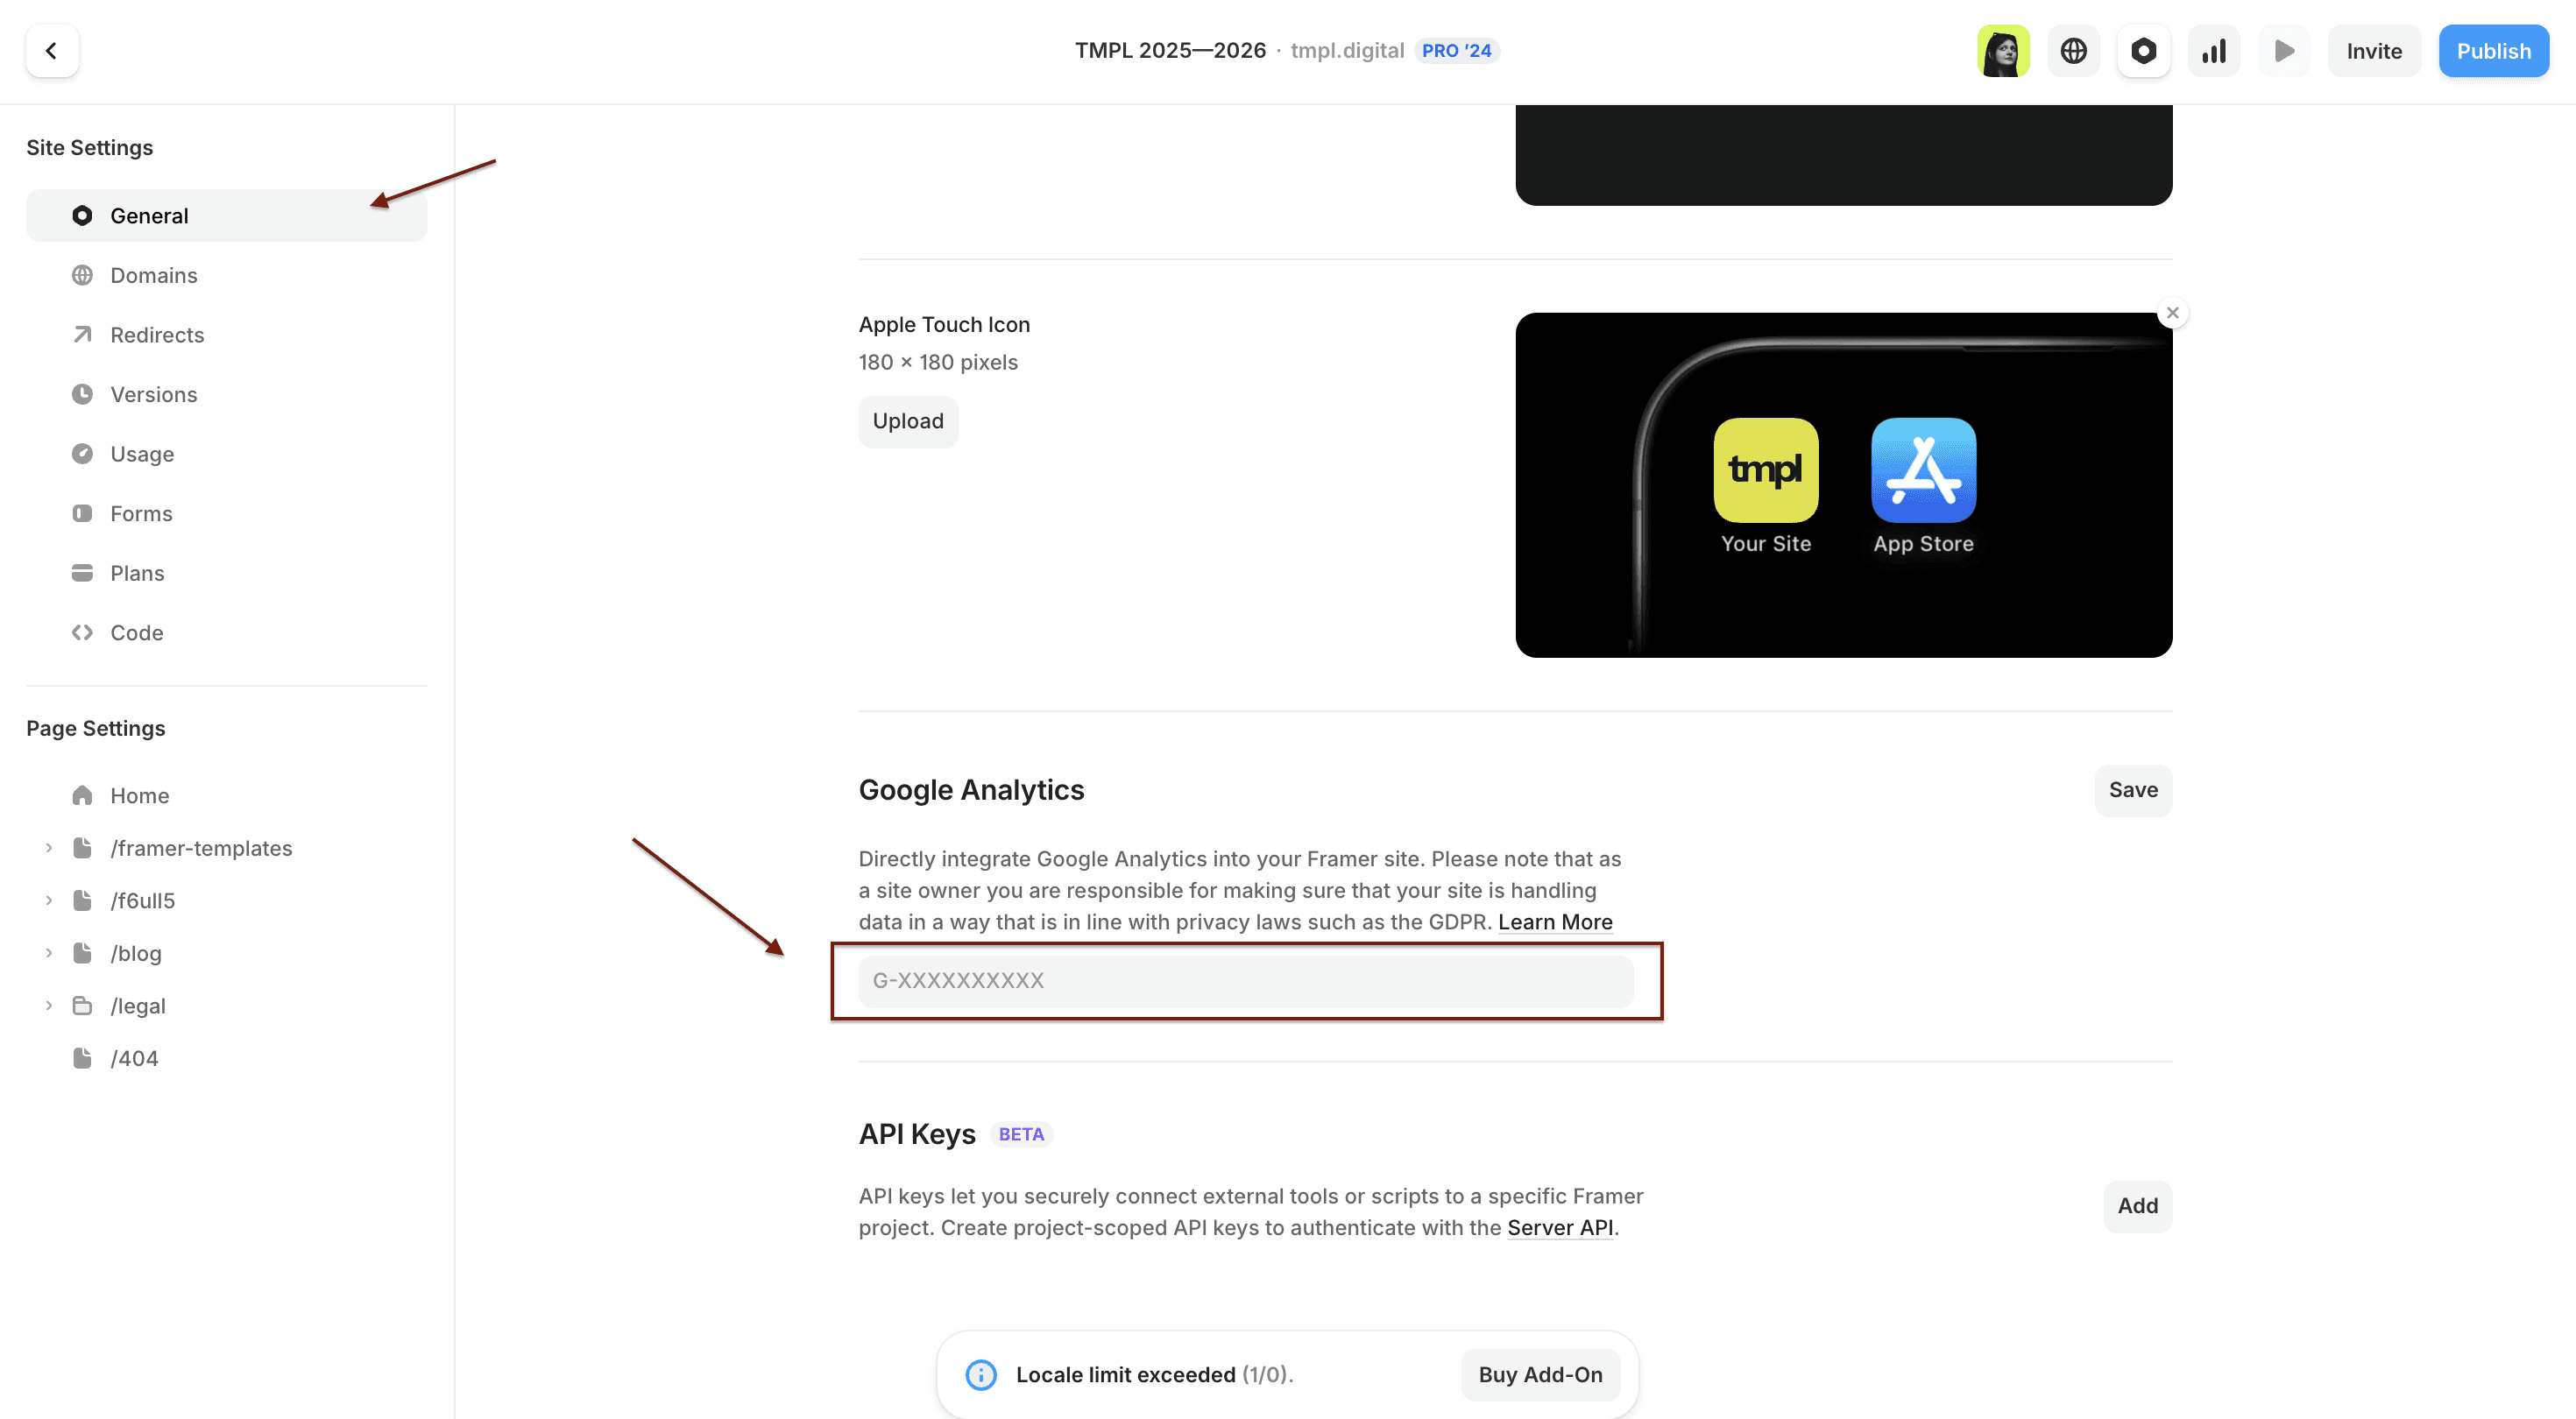
Step 2. Add the Measurement ID to Framer
Open your Framer project
Go to Site Settings (gear icon in the top bar)
Click General
Scroll down to the Google Analytics section
Paste your Measurement ID into the field
Click Save
That's it. No code, no scripts, no plugins.
Step 3. Publish your site
Click Publish (or Update if already published) in the top right corner. Google Analytics won't track anything until the site is published with the new settings.
Step 4. Verify it's working
Visit your live Framer site
Go to your Google Analytics dashboard
Open Reports → Realtime
You should see your visit appear within a few seconds
If nothing shows up after a few minutes, double-check that the Measurement ID is correct and that you published after saving.
What about GDPR?
GA4 doesn't store IP addresses, which helps with privacy compliance. That said, if your site has visitors from the EU, you may still need a cookie consent banner depending on what you track. This is worth checking with a legal advisor if you're not sure.
Want to use Google Tag Manager instead?
If you need more advanced tracking — custom events, click tracking, form submissions — you can use Google Tag Manager instead. Framer supports this too: paste the GTM code snippets into Site Settings → General → Custom Code (head and body sections).
Building a new Framer site? Start with a template — analytics-ready out of the box. Browse TMPL Framer templates.

